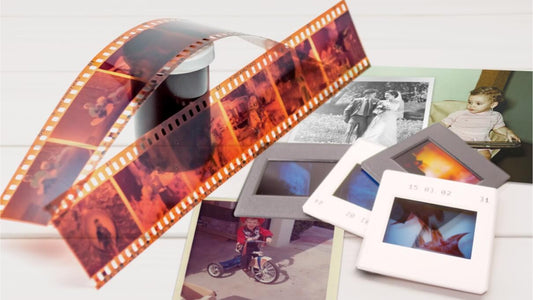
Old film negatives carry precious moments that can’t be replaced. But over time, they collect dust, fingerprints, and mold that can blur those memories. Whether you're preserving family photos or building a personal archive, knowing how to clean negative film properly is a must. At Capture, we've worked with millions of photos and film types, helping people protect what matters most. Cleaning your negatives is the first step before you scan, store, or restore them. Done wrong, it can cause damage, but when done right, cleaning can bring those hidden images back to life.
Essential supplies for Safe Cleaning
Before you touch a single frame, make sure you have the proper materials. Using harsh or incorrect supplies can do more harm than good.
Here’s what you need:
- Lint-free cotton or nitrile gloves
- A soft anti-static brush or gentle photography air blower
- Microfiber cloths or cotton pads
- A safe photo negative cleaner (not alcohol or ammonia-based)
- A clean, dust-free surface for drying
This basic kit helps you handle most situations, especially if you're about to clean negative film at home and want to avoid professional fees. It’s a cost-effective way to prepare your negatives for scanning or safe long-term storage.
Step-by-Step Cleaning Process
Start by washing your hands and putting on gloves. Even clean skin carries oils that can leave marks. Pick up one negative strip at a time and hold it only by the edges. If you notice loose dust or lint, use the air blower or anti-static brush to gently remove it. This is a dry method and is enough if the film negative hasn’t been badly stored.
For smudges or sticky spots, dampen a cotton pad with a small amount of photo negative cleaner. Gently wipe in one direction across the surface. Avoid circular motions - they can create visible scratches. Never soak the film or press too hard. Once cleaned and dry, your negatives will be easier to handle and ready for scanning. If you plan to convert negatives to digital, make sure the surface is spotless - dust or smudges can affect the scan quality and make editing more difficult later.
This process is perfect for those researching how to clean film negatives safely. It works on most formats, including color and black and white, and helps reduce the risk of permanent damage. If you've ever wondered how to clean photo negatives without ruining them, this method gives you a safe and simple place to start.
Common Mistakes to Avoid
Cleaning film might sound easy, but a few simple missteps can ruin a negative beyond repair. One of the most damaging mistakes is using alcohol or household cleaners. If you want to clean negatives without alcohol, you're already heading in the right direction. Alcohol can cloud or dissolve the emulsion layer, especially on older negatives.
Another mistake is using paper towels or tissues. These may seem soft but can leave fibers or cause scratches. Scrubbing or re-wiping the same area over and over is also harmful. Pressure and repetition can distort the film’s image layer. Even small scratches can show up clearly once you scan the film, making digital restoration much harder.
Always avoid touching the surface with bare fingers. Handling issues are common, especially when working with negative and positive film stored together in rolls or envelopes. And don’t rush! Film cleaning takes patience, especially for delicate images like weddings or childhood milestones.
Dealing with Stubborn Stains and Visible Damage
Sometimes basic cleaning won’t fix everything. Mold, glue residue, or film that’s stuck together requires special care. For mold, choose a cleaner that’s designed to handle biological growth. It should be safe for photographic emulsions and not contain strong solvents.
If you're working with standard formats like 35mm, it's best to clean them thoroughly before you convert 35mm negatives to digital, so you don’t scan in dust, scratches, or residue by mistake.
Use a cotton swab or pad with cleaner and work only on the affected area. Always test on the corner first to make sure there’s no reaction. If you’re handling old formats or extremely delicate rolls, consider contacting a restoration specialist before you go further.
Proper Storage After Cleaning
Once you clean a negative, it’s important to store it correctly. Putting it back into the same dusty sleeve will undo your work. Choose archival-quality film sleeves made of polyester or polyethylene. These materials won’t stick to the film or trap moisture. They also help prevent static buildup, which can attract dust and make your negatives dirty all over again.
Store negatives in a cool, dry, and dark place. Avoid heat, humidity, and direct sunlight, which can warp or fade the image. For safe storage, follow these tips:
- Keep negatives in upright storage boxes, not laid flat
- Use acid-free dividers if storing by event or year
- Label sleeves clearly to avoid excessive handling
If you’re planning a long-term archive or looking into cleaning photo negatives for scanning, organized storage will make your process smoother. Proper labeling also reduces unnecessary handling, which helps protect your film from future damage.
How to Clean Negative Film and Protect Your Photo Legacy
Learning how to clean negative film is a powerful way to preserve your memories. Clean negatives produce better scans, last longer in storage, and are easier to handle without damage. From basic dust removal to deep cleaning and careful storage, each step makes a difference. Whether you're working on a personal archive or looking to digitize family history, the right cleaning process ensures your photos can be enjoyed by future generations. Take the time to protect them now, and you'll never have to wonder what was lost.


