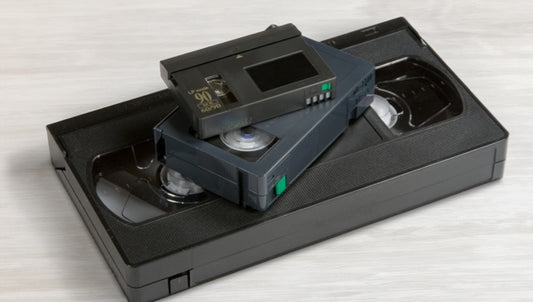
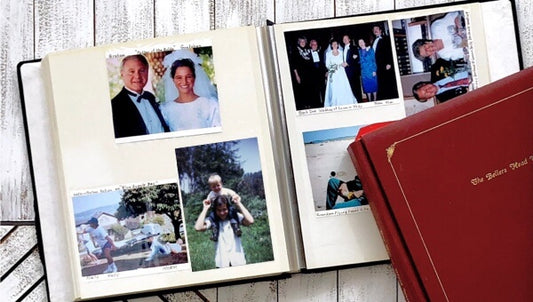
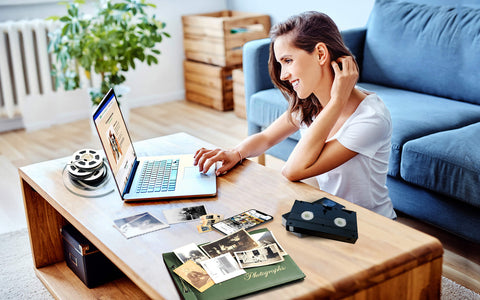
Remember those VHS tapes sitting in your closet or attic? You know, the ones with your kids' first steps, family vacations, or maybe even your wedding? Well, in 2025, you have a few ways for keeping those memories safe.
At Capture, we've been helping families save their memories for over 20 years. And while we'd love to help you convert those VHS tapes to digital formats (it's kind of our specialty), we know some of you might want to try doing it yourself at home.
That's why we put together this guide exploring the 12 most popular VHS-to-digital converters of 2025, including VIDBOX, ClearClick, Elgato, UCEC, and more. By the time we're done, you'll know whether DIY conversion or a professional service makes more sense for safeguarding your cherished moments.
Preserve Your Memories with Capture
Skip the hassle of DIY equipment — let our team handle your tapes with care and deliver high-quality digital results, fast.
Convert VHS to DigitalJump to:
- Top 12 Recommended VHS to Digital Converters in 2025
- 1. VIDBOX Video Conversion Suite - Easiest for tech-savvy users
- 2. Diamond VC500 Video Capture Converter - Simple and Affordable
- 3. ClearClick Video to Digital 2.0 - No Computer Needed
- 4. Elgato Video Capture Device - Best for beginners
- 5. UCEC USB 2.0 Video Capture Card Device - Best Budget-Friendly Option
- 6. DIGITNOW Video Converter - Real-Time Viewing and Conversion
- 7. Roxio Easy VHS to DVD Converter - Seamless DVD and Physical Transfers
- 8. Golden Videos - Not a Converter, But Software
- 9. Screen Recording
- 10. Local Shops
- 11. Major Retailers
- 12. Capture VHS to Digital Converter Service
- Simplifying VHS to Digital Transfers
Top 12 Recommended VHS to Digital Converters in 2025
In this section, we'll explore our top 12 picks for home video digitizing tools currently on the market.
We'll give you an honest look at each one, including what they do well, where they struggle, and what real users are saying.
Think of this as your insider guide—drawing from both user reviews and our own 20 years of expertise in video conversion.
1. VIDBOX Video Conversion Suite - Easiest for tech-savvy users
The VIDBOX VHS converter connects your computer to your VCR or camcorder in a surprisingly compact package.
At first glance, you might be struck by its minimalist design—there's not a single button in sight. Instead, you have these USB ports and RCA cables handling all the connections.
The build quality is solid for what you're getting, though there's one small quirk to mention: the RCA connections can feel a bit wobbly when you're plugging in cables.
Nothing too concerning, but you'll want to take care during setup.
The vendor has also included some thoughtful touches, like rubber feet to keep it stable and a power indicator light so you know when it's ready to go.

Image Source: https://www.amazon.com/VIDBOX-VCS2M-Video-Conversion-Suite/dp/B00ND0E7FS
Software & Performance
The software walks you through the process step by step, which sounds perfect for beginners. You can create files in MPEG, WMV, and MP4 formats, with decent video quality. However, there are some important quirks to know about:
- You need to connect any external DVD burner before starting a capture session
- Frame rates are fixed (30FPS for NTSC, 25FPS for PAL)
- Converting to MP4 offers limited quality settings
- You can't edit recordings after capture
- DVD burning must be done in one sitting
What's particularly nice is that you can keep both the original MPEG file and a converted MP4 version if you want to.
Key Specifications
- Inputs: RCA, S-Video
- Outputs: USB (compatible with USB 2.0 or 3.0 ports)
- Resolution: Supports pass-through up to 4K and streaming up to 1080p at 60fps
What's in the Box
- USB video capture device and cable (high quality)
- 2 quick start guides (multi-language)
- 2 software download cards
- Male-to-male RCA AV cables
Compatibility
- Windows 10 and 11
- Mac OS 10.12 or higher (USB adapter needed for newer MacBooks)
- Input devices: VHS, VHS-C, and Video 8 (not Digital 8 or Mini DV)
- Output formats: MPEG, WMV, MP4, and DVD
What Vidbox Customers Say
Most VIDBOX users are impressed with its DVD burning process, with several praising the quality of their digitized videos.
However, there's a consistent thread in reviews about the MP4 conversion—many note that it tends to darken the video output and sometimes reduces overall quality.
Some Mac users have reported compatibility issues, particularly with newer models, while others mention occasional recording failures that require starting over.
That said, customers consistently praise the responsive technical support team, which seems to make up for the somewhat tech-heavy user manual.
2. Diamond VC500 Video Capture Converter - Simple and Affordable
The Diamond VC500 is perhaps one of the cheapest video capture devices that you can find on Amazon.
This video capture converter simply uses RCA and USB port cable inputs with a simplified design that makes transferring as easy as possible with one touch.
A blue power light shows when it's ready to work, and while there's a record button on top, you'll mostly control everything through your computer.
Just connect one end to your VCR using the standard red, white and yellow cables, plug the other end into your USB port, and you're ready to start digitizing.

Image Source: https://www.eneba.com/other-nch-golden-videos-vhs-to-dvd-converter-windows-key-global
Software & Performance
The included PowerDirector 12 software sets this converter apart from budget options.
It walks you through the entire process, from capturing your videos to editing and saving them in various formats like MPEG-2 and AVI.
You get some high-quality options here—the capture quality goes up to 8 Mbps, which is actually higher than most commercial DVDs.
There are a few things to note:
- Device must be plugged in before installing any drivers or software
- Video quality depends a lot on your VCR's built-in time base correction
- PowerDirector's bundled version has some premium features locked
- EZ Grabber software should be avoided as it can break drivers
- Can handle Macrovision-protected tapes with third-party software
And since PowerDirector is proper editing software, you can polish your videos before saving them to digital or burning them to DVD.
Key Specifications
- Inputs: Composite (RCA), S-Video
- Output: USB 2.0
- Compatible video formats: NTSC, PAL
What's in the Box
- VC500 capture device
- Composite AV cables
- Installation CD (includes PowerDirector 12)
- User manual
Compatibility
- Windows XP SP2, Vista, 7, 8, 10
- Input devices: VHS, Hi8, V8 cameras
- Output formats: MP4, MPEG-2, AVI
- DVD burning capability through PowerDirector
What Diamond VC500 Customers Say
Users generally praise the Diamond VC500's capture quality and included PowerDirector software—a real step up from budget converters. At $35, most say they're getting excellent results with their VHS tapes.
Windows compatibility varies—some report perfect operation with Windows 10, while others face issues after updates. One consistent advice: always connect the device before installing any software.
Most users recommend avoiding the EZ Grabber software, preferring PowerDirector or VirtualDub instead.
3. ClearClick Video to Digital 2.0 - No Computer Needed
This is one of our favorite home video preservation tools because it’s an all-in-one hardware and software tool.
With a built-in screen, you can watch your home movies during real-time transfer and the recording resolution can be as good as 720x480.
Since it has a screen and built-in software, you don’t need to download it to a computer (or even have a computer at all!). Just plug the RCA cables in and record videos directly to USB or SD card.

Image Source: https://www.amazon.com/ClearClick-Converter-2-0-Second-Generation/dp/B07V9JNRZY/
Software & Performance
If you don’t have a USB or SD card, you can still connect the HDMI cable to your computer to transfer that way.
The software makes digitizing your memories refreshingly simple. It skips all those confusing menus and options—just plug in your storage and start saving.
Though before you begin, you should know:
- Storage devices need to be 512GB or less
- Recording resolution is fixed at either 640x480 or 720x480
- No built-in editing features for trimming or enhancing videos exist
- All settings need to be chosen before starting a recording
- You can't pause and resume recordings
That said, you can watch everything happen right there on the built-in screen as you're converting. You can also connect the converter with your TV or computer using HDMI for a better viewing experience.
Key Specifications
- Inputs: RCA (Composite), S-Video
- Outputs: USB 2.0, SD Card Slot, HDMI (for viewing)
- Resolution: 640x480 or 720x480 (SD)
- Memory support: Up to 512GB storage devices
What's in the Box
- ClearClick converter with built-in screen
- Power adapter
- RCA audio/video cables
- Quick start guide
- 1-year warranty card
Compatibility
- Input devices: VHS, VHS-C, Betamax, Hi8, Video8
- Storage types: USB drives, SD cards
- Optional display: TV/monitor via HDMI
- Playback: Any modern media player
What ClearClick Customers Say
Most ClearClick users love how simple it is to start saving their memories. Just connect your VCR with the included RCA cables, pop in a USB drive or SD card, and you're ready to convert—no computer needed at all.
That built-in screen gets a lot of praise. People mention how nice it is to watch their old home movies while they're converting, making sure everything transfers properly. Though some wish they could trim or edit videos directly on the device.
The $160 price tag is higher than basic converters, but users say the quality and convenience make it worth it.
4. Elgato Video Capture Device - Best for beginners
If you’re looking to save your old VHS tapes or camcorder videos, the Elgato Video Capture device is a handy solution.
You can connect it to your VCR, camcorder, or almost any older video player. It works with your Mac, PC, or even some iPads.
The design is simple and intuitive, with no buttons to fuss over. Just connect the USB and RCA cables, and you’re ready to start transferring.
Plus, it includes adapters that make switching between different video formats a breeze.

Image Source: https://www.amazon.com/Elgato-Video-Capture-Digitize-iPad/dp/B0029U2YSA
Software & Performance
If you’re just getting started with digitizing, the Elgato software makes things easy by walking you through each step.
It covers all the main formats—NTSC, PAL, SECAM, and PAL/60—so you’re set for most camcorder and VHS tape types.
The resolution caps at 640x480 or 640x360, which is good enough for viewing, though it’s not the sharpest.
A few things to keep in mind:
- You need to connect any external DVD burner before starting a capture session.
- Frame rates are fixed (30FPS for NTSC, 25FPS for PAL).
- Converting to MP4 offers limited quality settings.
- You can’t edit recordings after capture.
- DVD burning must be done in one sitting
The Elgato device is great if you’re looking for an easy way to save old tapes. While it has a few limits, it’s one of the simplest options for preserving family videos.
Key Specifications
- Inputs: RCA, S-Video
- Outputs: USB (compatible with USB 2.0 ports)
- Resolution: 640x480 or 640x360
- Frame rates: 30FPS for NTSC, 25FPS for PAL
What's in the Box
- Elgato Video Capture hardware
- Composite-to-SCART adapter
- Composite video/RCA stereo cable
Compatibility
- Operating Systems: Windows 7 or later, Mac OS X 10.6.8 or later
- Input devices: VHS, VHS-C, Video8
- Output formats: MPEG, MP4, H.264
What Elgato Customers Say
Most Elgato users find it’s an easy way to preserve old memories. Setup is quick, and the software guides you through each step of the conversion.
Some users mention that audio and video can drift out of sync on longer recordings. Not ideal, but manageable if you’re doing shorter tapes.
For those with newer systems, it’s best to stick with USB 2.0 ports—users say compatibility with USB 3.1 or Windows 11 can be hit or miss.
5. UCEC USB 2.0 Video Capture Card Device - Best Budget-Friendly Option
The UCEC Video Capture Pro connects your old video equipment to your computer through a compact, no-frills design. One end handles your video inputs—both composite and S-Video—while the other plugs right into your USB port.
This device keeps things simple by skipping the need for driver downloads on most systems. Just plug it in, fire up your capture software, and you're ready to start preserving those memories. It works with VCRs, camcorders, and even Hi8 tape players.
Build quality hits the mark for a device in this price range. The connections feel secure, and the included extension cable gives you plenty of room to set up your recording station wherever you need it.

Image Source: https://www.amazon.com/UCEC-Capture-Device-Converter-Windows/dp/B07PS2TD9L
Software & Performance
The device records video in H.264 format, which means your converted files will work smoothly on everything from iPads to YouTube. While the included software is Windows-only, there are some important things to note:
- No drivers needed for basic setup
- Works with both NTSC and PAL formats
- True stereo audio capture
- Compatible with third-party recording software
- Supports direct uploads to social media
- Handles most copy-protected tapes without issues
Although the results won’t be as high-quality as some of the more expensive competitors, this is a great starter option for anyone looking to back up old recordings with minimal setup.
Key Specifications
- Inputs: Composite (RCA), S-Video
- Output: USB 2.0
- Resolution: 480p (NTSC/PAL compatible)
- Format: H.264/MPEG-4
What's in the Box
- UCEC Video Capture device
- RCA composite cable (4 ft)
- Software installation disc
- User manual
Compatibility
- Windows 7, 8, 10, 11
- Mac OS X 10.10 or later
- Input devices: VHS, VCR, Hi8, Camcorder
- Output formats: AVI, MPEG2, MPEG4, H.264
What UCEC Customers Say
Many users find their digital videos end up being blurry or fuzzy and, in some cases, the colors may not be transferred properly.
The converter is also not designed for long-term use and works best when you combine it with a video editor.
Still, it offers a simple way to preserve footage before your VHS tapes wear out - because they won’t last forever.
Overall, UCEC USB 2.0 Video Capture Card Device is practical choice for anyone looking to create digital copies of old footage without spending a lot.
6. DIGITNOW Video Converter - Real-Time Viewing and Conversion
The DIGITNOW Video Converter makes preserving old tapes a breeze—just plug in your VCR or camcorder and watch your memories come alive on its built-in 5-inch screen.
The converter skips the computer entirely, letting you save directly to an SD card. With both HDMI and standard AV connections available, it works with practically any video player you've got tucked away.
Built-in speakers mean you can monitor both picture and sound quality as you record, ensuring your memories are captured exactly the way you remember them.

Image Source: https://www.amazon.com/DIGITNOW-Digital-Converter-Capture-Camcorder/dp/B07JVQVR3Q
Software & Performance
Operating the DIGITNOW is refreshingly simple. The menu system offers clear options for recording quality up to 1080p, and you can start capturing with just a press of the record button.
The recording process works in real-time, meaning a two-hour tape takes two hours to convert. But there's an upside—you can watch and listen as your memories transfer, making sure everything comes through just right.
Some key features to know:
- Records directly to SD card in H.264 format
- Simple playback controls for reviewing captures
- Can hide date/time stamp if desired
- Easy file transfer to computer via USB
- Multiple video quality settings available
- Built-in video preview during recording
What's particularly convenient is how you can review your recordings right on the device before transferring them. No need to move files to a computer just to check the quality.
Key Specifications
- Inputs: RCA (Composite), HDMI
- Outputs: SD Card, HDMI out, USB
- Screen: 5-inch built-in display
- Resolution: Up to 1080p60 recording
What's in the Box
- DIGITNOW Video Converter
- RCA composite cable
- HDMI cable
- USB power adapter
- SD card
- User manual
Compatibility
- Input devices: VCR, camcorder, DVD players
- Output: SD cards, TVs, computers
- File transfer: Windows 7/8/10, Mac OS X
- Storage: SD/SDHC cards up to 128GB
What DIGITNOW Customers Say
Most users love the converter’s simplicity—connect your VCR, hit record, and watch your memories transfer to digital. The built-in screen gets particular praise for letting you monitor everything without extra equipment.
Audio sync can be an issue with longer recordings though, and several customers recommend skipping the included SD card in favor of a quality brand like SanDisk.
While some users report units failing after light use, most find it delivers exactly what's promised: a straightforward way to preserve those old VHS tapes at a quality that matches the original.
7. Roxio Easy Transfer Kit- Seamless DVD and Physical Transfers
Roxio Easy VHS to DVD lets you transfer your tape footage through RCA or S-video connections. The device plugs into your VCR on one end and your computer's USB port on the other.
Recording captures in 480p resolution - matching original VHS quality. The footage plays well on phones and tablets but can look soft on modern TVs.
The software organizes recordings into projects, with options to enhance video quality, add transitions, and save to multiple formats. You can come back to edit these projects anytime or burn them straight to DVD.

Image Source: https://www.amazon.com/Digital-Converter-Amazon-Exclusive-Windows/dp/B07TWN55VV?th=1
Software & Performance
Roxio's included software focuses on DVD creation but handles digital formats too. The interface guides you through capturing, basic editing, and output options - whether you're burning discs or saving files.
The recording process captures at original VHS quality, with tools for color correction and noise reduction. You can trim clips, add transitions, and enhance video before saving or burning.
Some things to note about Roxio:
- Records in MPEG and H.264 formats
- Basic video enhancement tools
- DVD authoring and burning
- Scene trimming and transitions
- Multiple output options (DVD, file, SD card)
- Projects can be saved for later editing
You can get it from the official Amazon or Walmart website.
Key Specifications
- Inputs: RCA (Composite), S-Video
- Output: USB 2.0
- Resolution: 480p/720x480
- File formats: MPEG-2, H.264
What's in the Box
- USB capture device
- RCA composite cables
- Installation CD/download link
- Quick start guide
Compatibility
- Window: 7 SP1, 8, 10 (some Windows 11 issues reported)
- Mac (Separate version available)
- Input devices: VHS, camcorders, DVD players
- Minimum display: 1024x768
What Roxio Customers Say
Long-time users say it works well for basic tape transfers to disc, though many recommend skipping the included software and using VirtualDub for better results.
The biggest complaints center around Windows 11 compatibility issues and driver problems, with several users reporting installation failures or software crashes mid-recording.
Audio sync becomes problematic with longer recordings - anything over two hours often shows mismatched sound. However, most users find shorter captures work reliably once properly set up.
8. Golden Videos - Not a Converter, But Software
Golden Videos is a software tool designed to help you transfer old tapes into digital file formats like AVI or MPEG. You install it on your computer and connect your VCR using a USB video capture device. The software offers a step-by-step guide to make the process simple, even for beginners.
Although the program doesn't come with hardware, its editing tools make it valuable. You can enhance video quality by adjusting brightness, sharpness, and color. Plus, it’s entirely free to download, but you'll need to provide your own capture device and cables to complete the conversion.
Pros
- Fantastic video editing tools
- Great audio control
- 100% free
Cons
- Only includes video capture and editing software, so you’ll need a USB capture device and connector plug ins.
9. Screen Recording
Screen recording is a DIY method where you play your VHS tapes on a projector or TV and record the playback using a digital camera, modern camcorder, or smartphone. Some people try this option because it requires no special equipment beyond what they already own.

Capturing your memories starts with the right tools — whether you're filming or preserving the past.
However, this method typically produces poor-quality results. When recording a screen, you'll struggle with issues like glare, uneven lighting, audio distortion, camera shake, and room reflections—problems that are often impossible to fix even with editing.
If you do try this method, using a tripod and controlling room lighting can help. But for preserving precious memories, it's better to invest in proper digitizing through a digital converter or professional service that connects directly to your VHS player.
Pros
- Easy because you just set up the camera and record
- Convenient because you can easily set up a screen anywhere
- Affordable, possibly even free, if you already have a camera
Cons
- Low-quality results because you are recording the original home videos
- May need a tripod or other adapters to ensure stability
- The result could produce glares, outside sounds, and other imperfections
- Time-consuming because you must record in real time
We don’t recommend ever using this option because the results are poor, and the process is still time-consuming.
10. Local Shops
There may be local shops that offer digitization services near you. This makes digital conversion easy, but the quality and cost can vary greatly from one local shop to the next. We recommend that research reviews and other information to identify the best service for your needs.

Some local shops may handle tape transfers, but quality and turnaround time vary.
Certain shops may have extensive experience with legacy video formats, which can make them a good choice for handling older recordings. That said, pricing is often higher than what you’d find with companies that focus exclusively on media preservation.
Many local providers also give you the option to save your footage on DVD-video, CD-ROM, USB flash drive, or SD card. This can be useful if you want to share physical copies or play them on DVD players and TVs.
Pros
- You won’t have to ship your VHS tapes
- Professional quality results
Cons
- Expensive because it’s a specialty service (not their main offering)
- May not be able to handle larger orders
- Can take 70 days or longer (especially if the shop has a waiting list)
While this option has its benefits, the premium price and long turnaround times make it less practical compared to more direct at-home transfer tools.
11. Major Retailers
Many established retailers like Walmart, Sam's Club, CVS, and Costco offer media transfer services through their photo centers.
These retailers have partnered with Capture to handle the actual conversion work, so you get professional-grade digitizing with the convenience of a local drop-off.
Pricing varies by retailer, with Walmart starting at $12.96 for 30 minutes of footage and CVS charging around $25.99 per tape. Each store sets its own rates, so check around to find the best deal.

Retailers like Walmart and CVS partner with Capture to handle media transfers.
Keep in mind that even though Capture handles the digitizing, orders can take over 30 days to complete. This is because photo centers handle many services daily—from passport photos to prints—and your order is part of their larger queue.
Pros
- Fulfilled by Capture at many retailers for professional quality service and results
- Good customer support and guaranteed satisfaction
- No need to ship through the mail
Cons
- Pricing depends on the specific retailer’s fees (for example, CVS pricing starts at $25.99 whereas Walmart starts at $12.96 for the first 30 minutes)
- May get busy and stressful, which can delay processing times
- Not every retail location offers VHS to digital converter services
We like this option because it produces high-quality results, but due to the retailer’s unique fees, we still recommend going through Capture directly to save time and money!
12. Capture VHS to Digital Converter Service
Capture has been converting tapes into digital memories for over 20 years. We provide a trusted service that gets your originals and digital copies back to you in less than 30 days—far quicker than the typical 70-day turnaround elsewhere.

Capture offers a secure, professional way to preserve your home videos with ease.
Our secure tracking system follows your tapes through every stage, so you’ll always know where they are, and we stand by our work with a satisfaction guarantee. If you’re not happy with the result, we’ll reprocess them free of charge.
As part of our service, we also provide minor VHS repairs and cleaning to ensure your digital copies are in the best condition possible. While we don’t provide editing or enhancement, you’ll receive your videos in a ready-to-watch format - handled with care from start to finish.
Pros
- Professional quality results
- Results in less than 30 days (including transit)
- State-of-the-art tracking and security for your home movies
- Can convert many VHS types including VHS-C, S-VHS, S-VHS-V, and PAL format
- Produces your choice of DVD, digital download, or USB flash drive
- Satisfaction is guaranteed or we will reprocess for free
Cons
- Doesn’t offer video editing services or enhanced color or resolution
- No expedited option faster than 30 days
Capture offers a secure, worry-free way to preserve your old VHS tapes — with careful handling and high-quality digital results you can count on.

Old tapes hold precious memories — don't wait until it's too late to protect them.
Simplifying VHS to Digital Transfers
As you can see, there are lots of options that could qualify as the best VHS to digital converter option in 2025.
Some options, like DIY converter equipment, are best suited for tech-savvy audiences while options like Capture and other online services are perfect for those who want premium quality results.
Just make sure you consider the best options for your memories. You want to make sure you get high-quality digital results while also protecting your original analog media.
Check out our VHS to digital services or reach out to get a free quote for a variety of home videos and other media types.


